This post may contain affiliate links. Please see disclosure policy here.

Slider buns are perfect for parties and barbecues. This easy slider bun recipe is easy to make and delicious with pulled pork, hamburgers, or any other favorite slider recipe.

Why You’ll Love This Recipe!
Sliders are a great way to serve food at a party. You can fill them with little burgers, shredded chicken, pork or beef. The slider rolls are just a little more dense than a regular roll so that they hold the meat and don’t fall apart on you. They are still soft and just a bit sweet.
Typically when you buy them in the store they are a little more square in shape, and I prefer them to be round. They can sometimes be hard to find at the grocery store though, so making them yourself at home is so much easier and quicker than searching all over town for them. And they taste better too!

Ingredients Needed
- Active Dry Yeast
- Egg
- Sugar, you can substitute honey if you prefer.
- Flour, unbleached all purpose flour is my preference
- Butter, you can use salted or unsalted butter.
- Salt
How to Make Slider Buns
- Proof yeast with 3 Tbsp water.
- Combine flour, salt, and sugar in a bowl.
- Add in butter and use your fingers to crumble it into the flour mixture.
- Pour in yeast mixture.
- Add 1 cup water and egg and knead in a stand mixer with the dough hook until dough is soft and elastic. Dough will be slightly sticky.
- Place dough in a bowl and cover and let rise for about an hour or double in size.

- After the dough has risen, cut the dough into 16 even size pieces, rolling each piece into a little round ball. You can make them any size you want but I made mine about 2 inches across. Remember they will be a bit bigger when they rise.

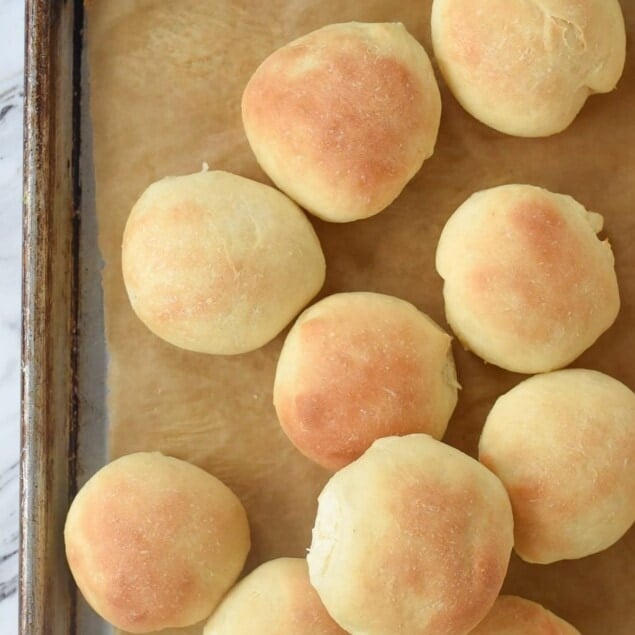
- Place the round balls of dough onto a parchment covered baking sheet. I usually flatten the ball of the dough slightly with my hand.
- Cover the pan with a cotton kitchen towel and let them rise another 30 minutes.

- Bake the slider buns at 400 degrees F for 12-15 minutes or until golden brown.
- Allow them to cool, then slice them open and fill them up!!
Tips
- If you are new to working with yeast or need a refresher, check out my tips on how to proof yeast.
- Dough likes a nice warm environment to rise in so if your house is cold, you can use your oven to help your bread rise. Turn your oven to 150 degrees F. and as soon as it reaches temperature, turn off the oven and place your bowl of dough covered with a cotton towel in the oven. Close the oven door and let the dough rise.
- To make sure your slider buns are all the same size, use a kitchen scale to weigh your dough. Weigh the whole piece of dough and then divide that weight by 16 to determine how much each roll should weigh.
- Always check the expiration date on our yeast first! I keep my yeast store in the freezer to help prolong the life of it. You can use it cold, straight out of the freezer.
- For a shiny crust, brush them with an egg wash before baking or melted butter after removinfg them from the oven.
- To dress them up, after brushing them with melted butter, sprinkle the top with coarse sea salt, minced onion, sesame seeds, or garlic powder.

Frequently Asked Questions
Can I use my bread machine?
You can. Just process the dough according to manufacturer’s directions and then remove dough after the dough cycle before it begins baking.
How do you store leftover slider buns
You can store these rolls right on the counter in an airtight container or wrapped in foil or plastic for 4-5 days. You can also easily freeze them by placing them on a baking sheet, freezing them and then putting them into a freezer bag or other airtight container. They will last up to 6 months in the freezer. Just thaw them on the counter when you are ready to use them.
Can I use rapid rise yeast instead of dry active yeast?
Absolutely. You will not need to proof the rapid rise yeast first. Just add it right in with the dry ingredients. You will still need the same amount of water.
For a few more of my favorite recipes check out these:
Be sure and follow me over on You Tube for weekly cooking demos.
Slider Bun Recipe
Ingredients
- 3 Tbsp warm water
- 2 1/4 tsp active dry yeast
- 1 cup warm water
- 1 egg beaten
- 3 Tbsp sugar
- 3 1/3 cups flour
- 1 tsp salt
- 3 Tbsp butter
Instructions
- In a bowl combine 3 Tbsp warm water and yeast. Let sit until foamy.
- In a bowl combine flour, salt and sugar.
- Add in butter and rub into flour with your fingers. It will form crumbs.
- Mix in yeast mixture, 1 cup water and 1 egg.
- Knead until smooth and elastic. Dough will be slightly sticky.
- Allow dough to rise for 1 hour or until doubled.
- Divide dough into 16 equal pieces and form each into a ball.
- Place on a parchment paper lined cookie sheet and flatten slightly with hand..
- Cover loosely with plastic wrap sprayed with non stick spray and allow to rise for about 30 minutes
- Bake at 400 degrees for about 12- 15 minutes or until golden brown
Tips & Notes:
- To help your dough rise better turn your oven to 150 degrees F. and as soon as it reaches temperature, turn off the oven and place your bowl of dough covered with a cotton towel in the oven. Close the oven door and let the dough rise. The nice warm environment of the oven will do the trick and your dough will rise fairly quickly.
- You can store these rolls right on the counter in an airtight container or wrapped in foil or plastic for 4-5 days. You can also easily freeze them by placing them on a baking sheet, freezing them and then putting them into a freezer bag or other airtight container. They will last up to 6 months in the freezer. Just thaw them on the counter when you are ready to use them.
Nutrition Facts:
Colleen says
These were very easy to make and my kids liked them. I used the 1% milk we had on hand and had to add a little extra flour to get the mixture to form a ball. Thanks for sharing the recipe.
trista says
May be a silly question, but I’m pretty new to bread.. do I need to mix the yeast before hand? Then add the ingredients? Or just throw everything in at once?
Leigh Anne says
I have updated the directions to make things a little more clear. I add the yeast and all the other dry ingredients together in the bowl and then add the milk with the melted shortening etc. Hope this helps!