This post may contain affiliate links. Please see disclosure policy here.

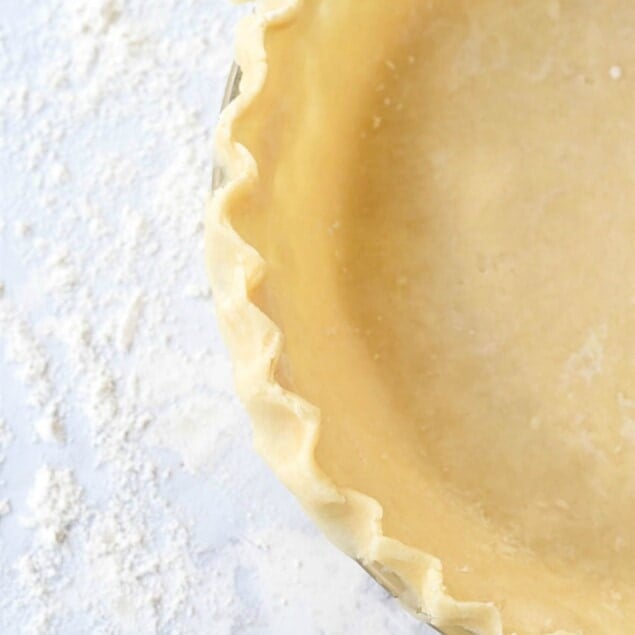
Making the Perfect Pie Crust is easy with this step by step tutorial and the results are a perfect crust every time. And all perfect pies start with a perfect pie crust.

Why You’ll Love This Recipe
Nothing can ruin a good pie quicker than a bad pie crust! Pie crust should be flaky and tender and never tough. And there are so many pie crust recipes out there. Some swear by shortening and others promise perfect results with butter. I am here to take all of the worry out of baking the perfect pie crust.
Several years ago a friend and I did a pie crust bake off. We tried all different recipes and combinations to see which one we thought was the flakiest, the most tender, the perfect pie crust. And today’s recipe is the one we liked the best. It is a combination of shortening and butter, so you get the best qualities of both.

Ingredients Needed
- Flour. Unbleached all purpose flour is my preference.
- Butter. Use a good quality butter
- Shortening. I use Crisco
- Salt
Tips from Leigh Anne
- Be gentle and handle the dough as little as possible. Overworking the dough and handling it too much will pretty much guarantee a tough crust.
- Use a combination of shortening and butter. Butter gives you great flavor and shortening gives you a flaky crust. It’s the perfect combo.
How To Make Pie Crust
- Combine shortening, butter, flour and pinch of salt in a deep bowl.

- Using your hands or a pastry blender, combine the ingredients until little pebbles form. Using a pastry blender will help keep the dough from getting too warm.
- Add water. Your water needs to be cold. I put some water in a cup and then fill it with ice cubes. You don’t need much water. I can’t tell you the exact amount because it will vary according to the day, the weather, etc. I just splash a small amount into the bowl and then use a fork to start “fluffing” the dough until it starts to hold together.

- Do not pour a bunch of water into the bowl! Add it teaspoon by teaspoon just until the dough holds together.
- Use your hands to form it into a ball. The dough should be soft and moist, but not wet.

- Divide dough into two balls. While working with one keep the other covered so it doesn’t dry out. Or if you only need one pie crust, you can freeze the second piece for later.
- If the dough has gotten warm, wrap it in plastic wrap and chill it for 30 minutes or so to make it easier to work with. When ready to work with it, place the dough you are using on a layer of wax paper and flatten it.

How to Roll Out Pie Crust
- Using a rolling pin, roll the dough out into a circle. If you are using a 9 inch pie plate make sure your circle is bigger than 9 inches. Use flour to keep the dough from sticking to the rolling pin.

- Lift up the wax paper and flip the pie crust over and into the pie pan. Remove wax paper and press the dough into pie pan.

- Using your fingers, form an edge around the pie and then if you are not using a top crust, flute the edge of the crust.

- Cover the pie with foil or plastic wrap. Put covered pie in the freezer for about 30 minutes to allow the pastry to firm up a bit and to prevent shrinkage while baking.

- Depending on the type of pie you are making you may fill the pie or bake the crust first. For Grandma Zola’s Chocolate Meringue Pie I blind baked the crust first.

Frequently Asked Questions
What is a blind baked pie crust?
Blind baking is the process of baking a pie crust without the filling. Baking blind is done for cream pies where the filling will not be baked. It is also used for pies and quiches when the filling has a shorter bake time than the crust. Blind baking is also used to keep a pie crust from becoming soggy due to a wet filling. It is also called pre-baking.
Can I freeze pie crust?
Pie crust freezes great. Form the dough into a flattened disc, wrap in plastic wrap and then place in a zippered freezer bag. It will last in the freezer for 1-2 months.

How to Blind Bake a Pie Crust
There are a couple different methods for blind baking a pie crust
Method 1:
- After placing pie crust in pie plate, freeze for 30 minutes.
- Remove from refrigerator and line your pie crust with parchment paper. Fill with pie weights which are ceramic or metal beads. You can also use rice or dried beans. Remove the weights and paper after Bake at 425 degrees F for 12-15 minutes and then remove weights and paper, the crust will just beginning to turn golden brown. Bake for an additional 5-10 minutes or until crust is totally golden brown
Method 2:
- An easier method is to pierce the crust with a fork to produce small holes after freezing for 30 minutes. The holes will allow steam to escape and prevent crust from bubbling up. Bake at 425 degrees F for 15-20 minutes or until crust is golden brown.
Check out more of my favorite recipes:
Be sure and follow me over on YouTube for weekly cooking demos.
Pie Crust Recipe
Ingredients
- 2 1/2 C all purpose flour
- 1/2 C butter
- 1/2 C shortening
- pinch of salt
- ice cold water add teaspoon by teaspoon until right consistency has formed
Instructions
- Place flour, salt, butter and shortening in bowl.
- Use your hands to combine ingredients until small pebbles form
- Add cold water a teaspoon at a time until the dough begins to hold together and form a ball.
- Do not over handle the dough. Dough should be soft, moist but not wet.
- Divide dough in half.
- Place ball of dough onto wax paper and flatten. Place another piece of wax paper over the top and roll out the pastry into a circle. If your pie pan is 9 inch make sure your circle is bigger than 9 inches so you have enough for the edging..
- Remove the top layer of wax paper and place pastry into pie tin. Remove other piece of wax paper and press pastry into pan. Use your fingers to crimp the edge of the crust.
- Freeze for 30 minutes to firm up the pastry. This helps prevent pastry from shrinking during baking.
- Prick the bottom of crust to prevent bubbling during baking.
- If pie calls for a baked crust bake at 400 degrees. For the first 10-12 minutes keep the edges of pie covered with foil and then remove for the last 15 minutes. Bake until golden brown.
- Recipe makes two 9″ pie crusts
Tips & Notes:
- After placing pie crust in pie plate, freeze for 30 minutes.
- Remove from refrigerator and line your pie crust with parchment paper. Fill with pie weights which are ceramic or metal beads. You can also use rice or dried beans. Remove the weights and paper after Bake at 425 degrees F for 12-15 minutes and then remove weights and paper, the crust will just beginning to turn golden brown. Bake for an additional 5-10 minutes or until crust is totally golden brown
- An easier method is to pierce the crust with a fork to produce small holes after freezing for 30 minutes. The holes will allow steam to escape and prevent crust from bubbling up. Bake at 425 degrees F for 15-20 minutes or until crust is golden brown.
Nutrition Facts:
Emmy says
Thanks for sharing this recipe. I am excited I try it!
Trisha says
Hi Leigh Anne:)
Thanks for such a great blog! Did you compare pie crusts using lard? I found that lard makes a really flaky crust too. I’m just curious. If I can find another recipe that is just as flaky using ingredients I always have on hand then I’d rather use that than one with lard. although lard makes a tasty crust too. Also, do you have any tricks to keep pie crusts from shrinking? Mine always shrink up–no matter what recipe I use. Thanks for your help!
Leigh Anne says
Trisha, I only used butter or shortening, no lard.Do you think there is that much difference between shortening and lard? I haven’t ever really worked with lard. By freezing the crust in the pan for 30 minutes prior to baking it seems to help prevent shrinking.
Trisha says
I’m really curious so I’ve been doing some research on this:) Lard is made from animal fats. Modified vegetable oils are unhealthy–shortening. It’s important to get real lard though, not what is sold in the baking isle. Not hydrogenated. You can get real lard in some meat departments. The butchers just pack it up themselves. A lot of people swear by lard for a flaky crust, but some don’t like the taste. I like the taste but don’t always have it on hand. I guess I could buy it and freeze what I don’t use…here is one of the links I found with a thread on this topic. http://www.cheftalk.com/t/70532/lard-as-a-substitute-for-shortening-in-pie-crust-and-cookie-recipes
I’m excited to try your recipe…Thanks for posting this!
Leigh Anne says
Guess I am going to need to get me some lard and give it a try! Thanks for the info.
Danielle says
I have become a lard lover! It is all natural and nowadays people are seing that natural trumps lab made every time! My mom gave me her recipe (similar to yours but she adds a bit of apple cider vinegar as it also helps flake the crust nicely). Her mom used lard but my mom grew up in the time when shortenng was king, so she used that. I currently live in Poland and we have an all natural meat factory so I get lovely lard whenever I want. My mom came here and I suggested we use lard like her mom used. She was amqzed at how much better it is and she said she will never use shortening again!
Mentor Mom says
I LOVE to bake pies, and always use my Grandma’s Pie Crust recipe. 🙂
One tip for not over-browning/burning the crust: if you have a convection oven, cook most of the time on convection bake, and then switch to regular bake for the last 10-15 minutes. This will make your crust golden brown and not crispy.
🙂 🙂 🙂
Leigh Anne says
No convection oven here but thanks for the tip.
Amie says
Leigh Anne, I would love to get a thankful sign from you. It is so cute! Also I’ll definitely try your pie crust recipe. I’ve never been successful with pie crust 🙂
Let me know how to take care of payment etc.
Thanks!
Leigh Anne says
Emailed you with the info!
Tina says
How much cold water do u use!!!!
Leigh Anne says
As I explained in the post the amount will vary I just add it in a few teaspoons at a time until it is soft and moist but not wet. It is not an exact science and is done to feel. Just add a little at a time
Brenda says
Usually ends up about 6 tlbs. of water. But like she said, add only maybe 1 at a time. Love mine, so flakey, never had a complaint from a single soul to this day, and I’ve been using this for about 45 years.
Cami Reschke says
Thank you, thank you, thank you! I am still a bit intimidated by pie crust, but hopefully with a bit of practice I won’t have to be. I feel like some of your methods (like using your hands and freezing it for a half hour) will help me avoid the mistakes I usually make. Thanks so much!