This post may contain affiliate links. Please see disclosure policy here.
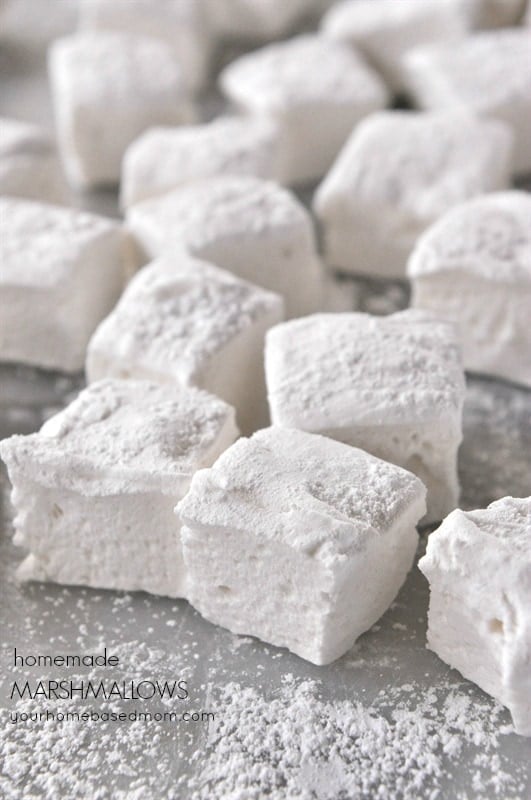
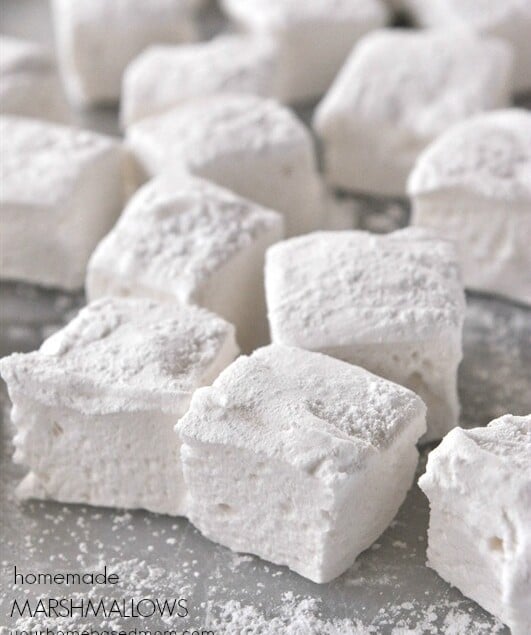
These homemade marshmallows are soft, sweet, fluffy and pure goodness. Perfect for adding to hot chocolate or using to make a s’more or just for eating!
Why You’ll Love This Recipe!
Hot chocolate is the hot beverage of choice at our house. If you are going to have hot chocolate, you must have marshmallows, lots of marshmallows. We love the little mini marshmallows you buy at the store but have you ever had a homemade marshmallow on your hot chocolate? It’s pretty much life changing! They are also perfect for a s’more, or just to enjoy on their own. And they are so much easier to make than you might think.
Making homemade marshmallow is a lot easier than you might think. I tried several different marshmallow recipes until I found one that set up just right, had the right texture and tasted great. The recipe I love is one from Marshmallow Madness by Shauna Seever.
Ingredients Needed
- Unflavored powdered gelatin
- Sugar. Granulated sugar and powdered sugar.
- Light corn syrup
- Salt
- Pure vanilla extract
How to Make Homemade Marshmallows
- Spray a 7 x 10 inch pan with cooking spray. You can use an 8 x 8 pan or for slightly thinner marshmallows.
- In your mixer bowl, sprinkle gelatin over cold water and let sit for 5 minutes.
- Stir together the sugar, corn syrup, water, and salt in a medium saucepan over high heat.
- Bring to a boil and allow to boil, stirring occasionally, until the temperature reaches 240 degrees F
- Slowly pour the hot mixture into the mixer bowl over the gelatin, keeping the mixer running.
- Increase the speed to medium and beat for 6-7 minutes until white and fluffy.
- Beat in the vanilla;
- Pour mixture into the prepared pan, using an offset spatula to smooth it into the corners.
- Allow to set for several hours. Once set, use a knife to loosen the marshmallow from the edges of the pan.
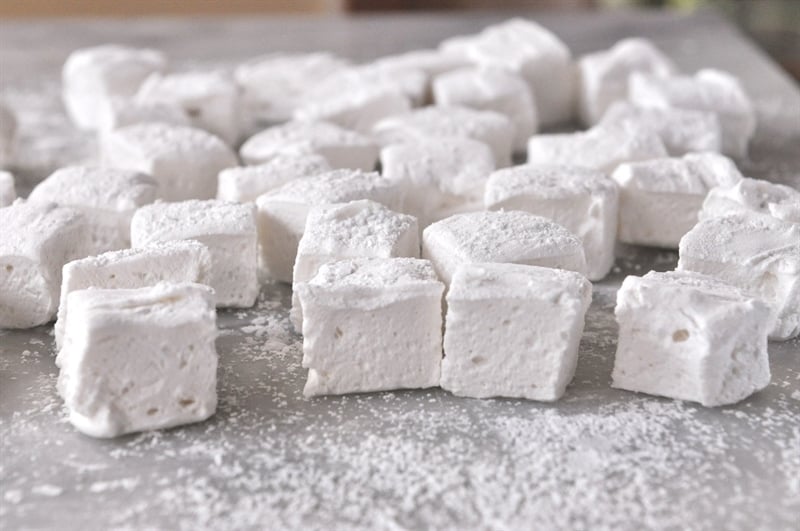
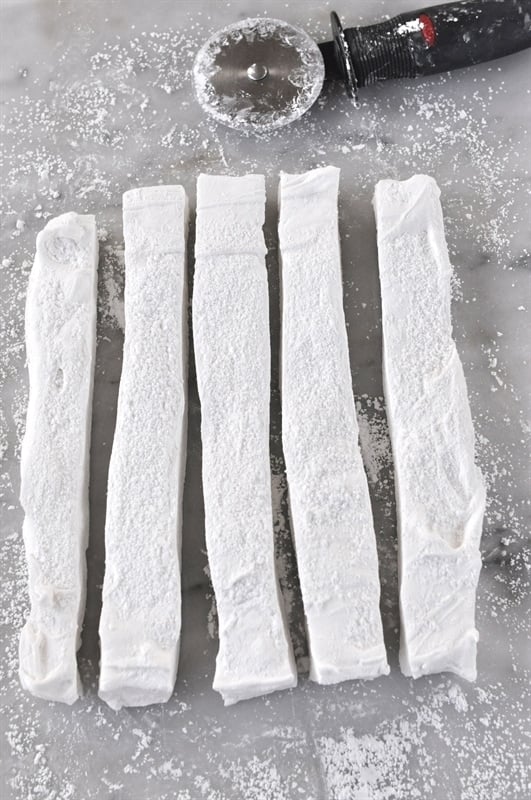
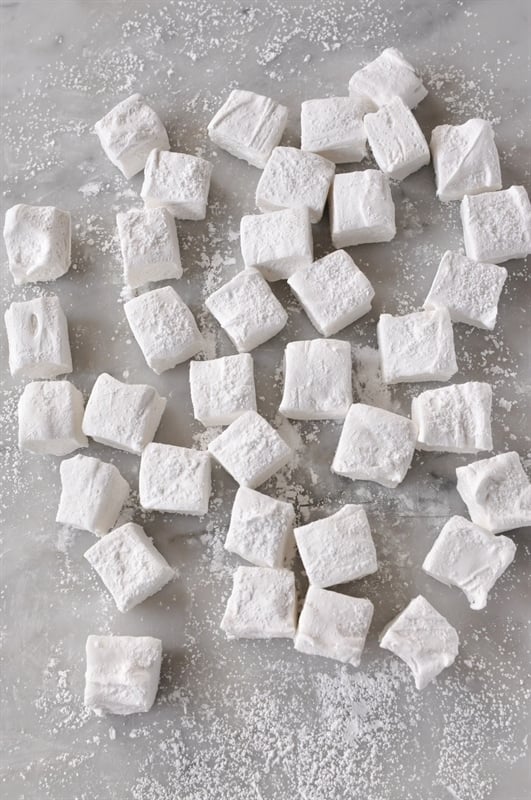
- Turn over onto a powdered sugar dusted work surface, cut into squares with a knife or pizza cutter and toss marshmallows into powdered sugar to coat all sides, shake off the excess.
Tips from Leigh Anne
Two tools you need for making marshmallows are a nice heavy pot and a candy thermometer. Using both will give you the best results.
Try these other yummy marshmallow recipes!
Be sure and follow me over on You Tube for weekly cooking demos.
Homemade Marshmallows
Ingredients
- 2 Tbsp unflavored powdered gelatin
- 1/2 C cold water
- 1 C granulated sugar
- 1/2 C light corn syrup
- 1/4 C water
- pinch of salt
- 1 tsp pure vanilla extract
- 1/2 cup powdered sugar for dusting divided
Instructions
- Spray a pan with cooking spray. You can use an 8 x 8 pan or for slightly thinner marshmallows I used a 7 x 10 size pan
- In your mixer bowl, Sprinkle gelatin over cold waterl and let sit for 5 minutes.
- Stir together the sugar, corn syrup, water, and salt in a medium saucepan over high heat.
- Bring to a boil and allow to boil, stirring occasionally, until the temperature reaches 240 degrees F
- Slowly pour the hot mixture into the mixer bowl over the gelatin, keeping the mixer running.
- Increase the speed to medium and beat for 6-7 minutes until white and fluffy.
- Beat in the vanilla;
- Pour mixture into the prepared pan, using an offset spatula to smooth it into the corners.
- Allow to set for several hours. Once set, use a knife to loosen the marshmallow from the edges of the pan.
- Turn over onto a powdered sugar dusted work surface, cut into squares with a knife or pizza cutter and toss marshmallows into powdered sugar to coat all sides, shake off the excess.
Nutrition Facts:
Jim Bell Jr says
I made these for the first time today. They are amazing. I probably will not be purchasing store marshmallows again. So easy. Thank you for the recipe!
Belinda Rivera says
Thanks for sharing, I want to make them for my granddaughter
Marissa Ortega says
Perfect! These came out so good and super easy to make, who knew? Was my first time making homemade Marshmallows but will not be the last!
Leigh Anne Wilkes says
Glad you loved them!