This post may contain affiliate links. Please see disclosure policy here.
An easy to follow tutorial on how to make a fabric pennant banner. The banner is the perfect way to dress up any celebration.
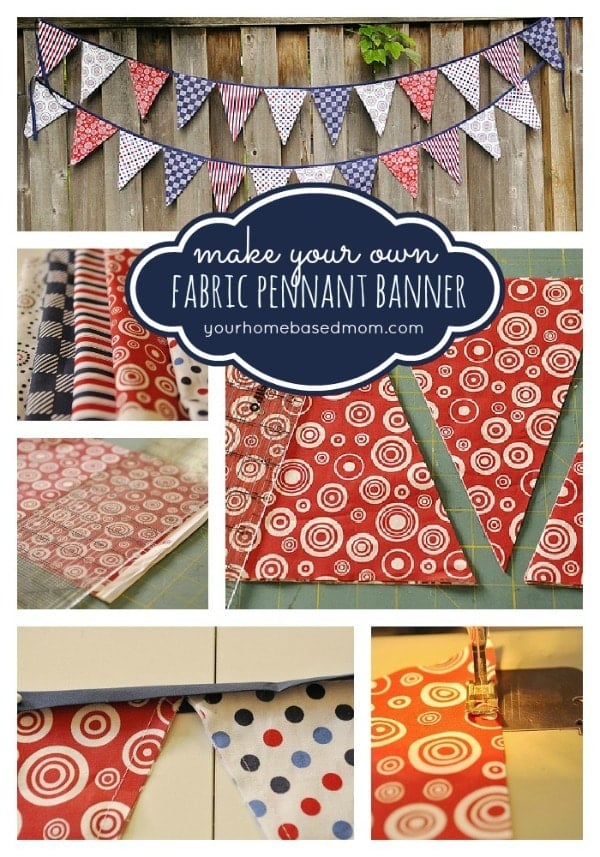
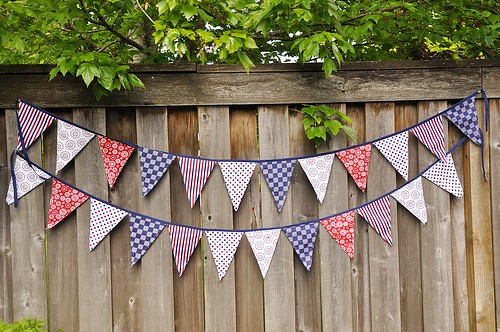
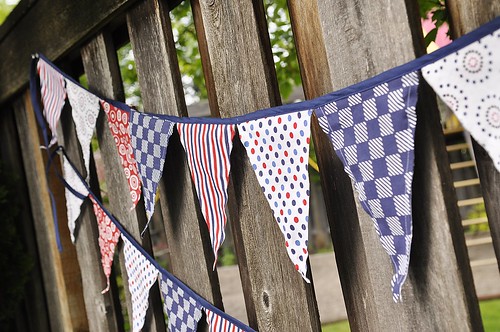
One of my favorite decorations to make for a party is a fabric pennant banner. A banner just makes everything more festive! It’s also a great way to tie your color scheme together for a party or event
Tessa’s Sail Away Graduation party was the perfect excuse to make another one! This time with a nautical color scheme.

Pennant Banner Supplies
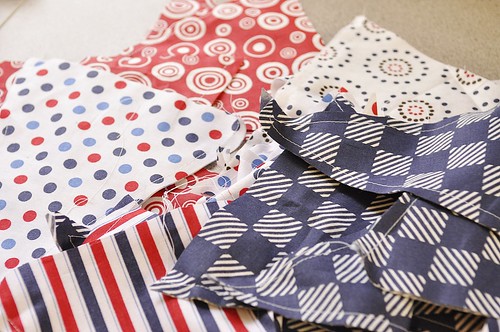
- Fabric. You will need a half a yard of five different fabrics You want a variety of color, pattern and scale (some small prints, some large)
- Extra Wide Double Fold Bias Tape. Each package is 3 yards long so to use all your pendants you will need 4 packages.
- Thread
- Sewing Machine
How Big is the Banner?
This amount of fabric will make 4 banners that are 3 yards long each. The pennants are 9 inches long and 7 inches across at the top. A 1/2 yard is 18 inches so you will get two rows of pennants with 20 pieces or 10 pennants from each fabric.
Each banner had 12 pennants on it or a total of 48 between the 4 (I had two extra left over)
How to Make a Pennant Banner
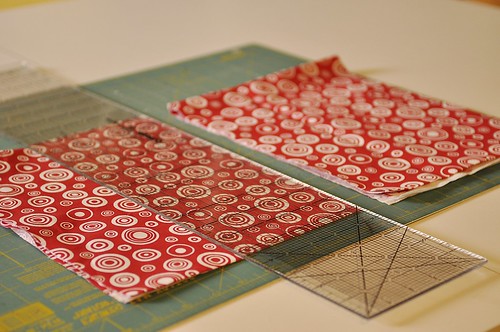
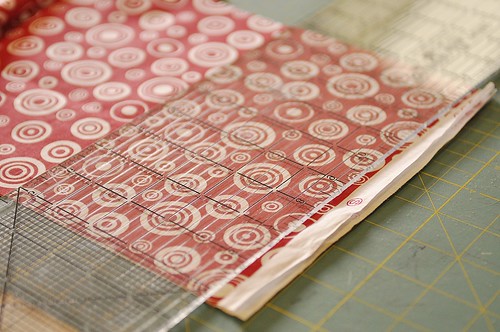
- Cut each fabric into two 9 inch pieces (cut fabric in half across the width of the fabric)
- Open up the fabric so there is just two layers and lay each piece on top of each other. You will have four layers of fabric. Make sure salvage ends are together..
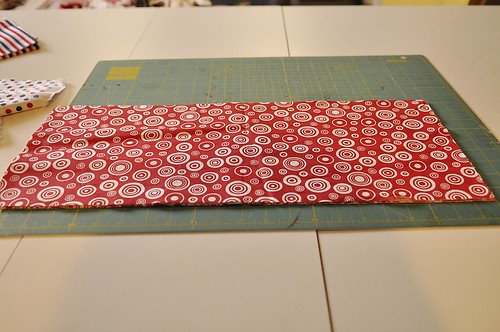
- Trim off the salvage on the end.
- Cut your pendants. Remember they are 7 inches across the top at the widest point and 9 inches long. Using a ruler and a rotary cutter or scissors, lay your ruler at an angle. At the 7 inch mark and the 3 1/2 inch mark and cut
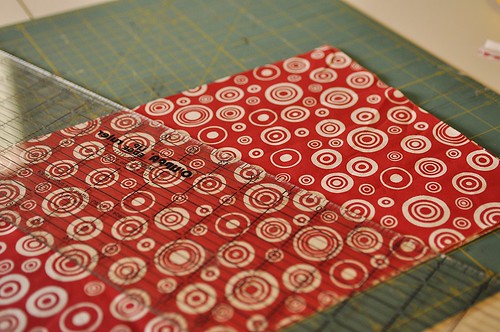
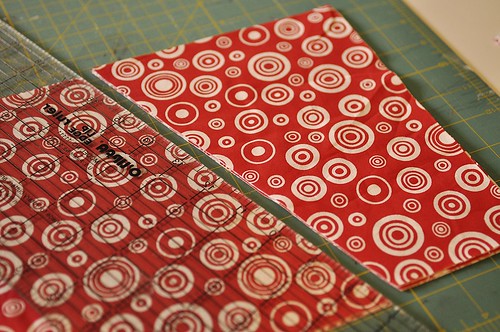
- Next place your ruler at the bottom 3 1/2 inch mark you just cut to and then angle it up to the upper corner and cut. Discard the piece you cut off on the right hand side.
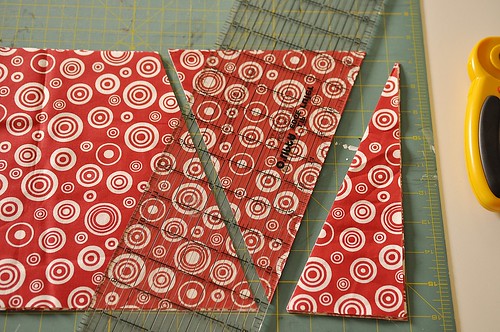
- To cut your next pennant just angle the ruler from the upper point down to the 7 inch mark.
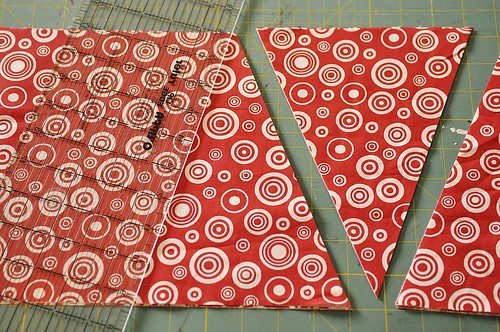
Just keep repeating. You will get a total of 20 or 10 sets of pennants from the 1/2 yard.
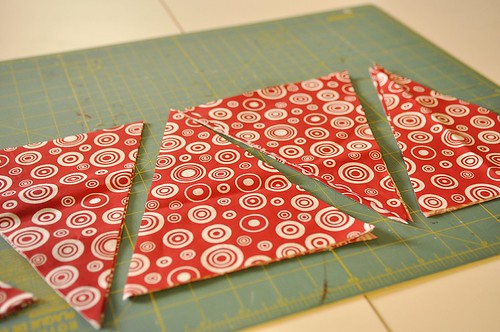
- Repeat with remaining fabrics.
- After all pennants are cut place two pieces (matching fabric) together with wrong sides together.
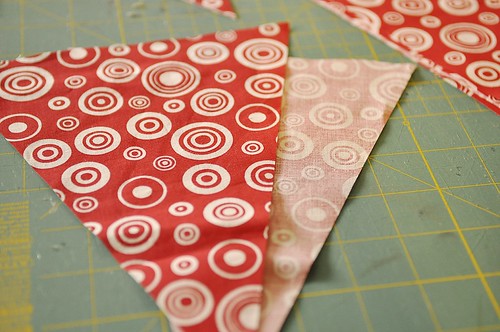
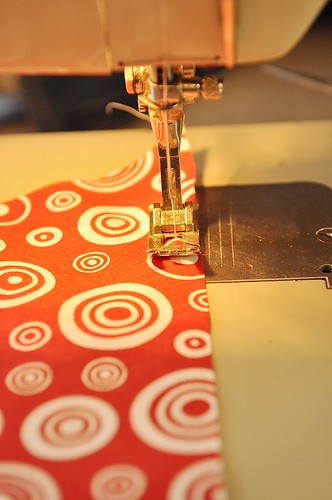
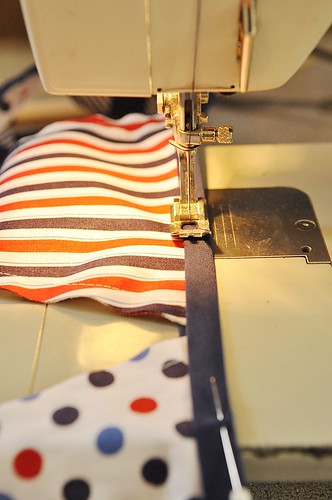
- With edges even sew down the two long sides of the pennants. Starting at the top and pivoting at the point. You do not need to sew the top closed as it will be closed when you attach to the bias tape.
I just keep my pressure foot right along the edge.

You will then have a nice pile of pennants. Fifty to be exact.
- Lay out your pennants in the order you would like them. I do not put my pendants in perfect alternating order. I mix it up a bit so it doesn’t look too perfect.
- Attach bias tape to them.
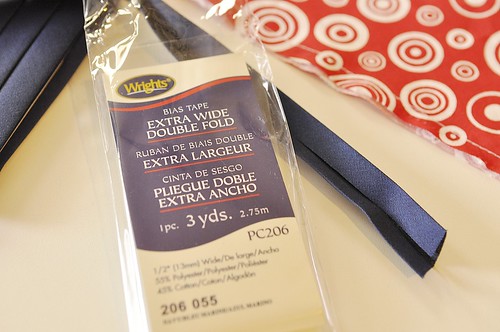
With bias tape, one side is slightly longer than the other. Leaving about a 12 inch tail on the end (you will use this to tie it onto something), place your pendants inside your bias tape being sure the shorter side of the tape is up.
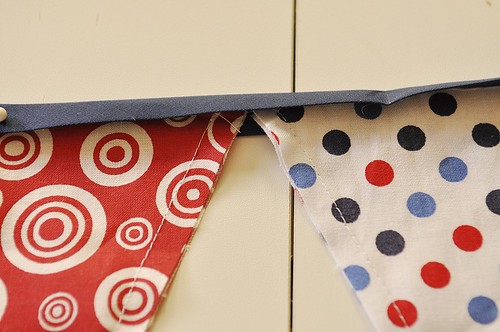
- Place the pendants so they are end to end. Then sew down the bias tape, stitching close to the edge. You will have a tail of about 12 inches on either end with no pennants. Sew this closed too.
I prefer to make four separate banners rather than one long one as this gives me more flexibility in where and how I hang it.
Now you are ready to hang up your pennant banner and celebrate.
You can also see how I used pennant banners for our Wedding Carnival.
Jen of Quality Sewing Tutorials says
Great tutorial! You’ve been featured on the Quality Sewing Tutorials blog.
We hand select only the best free tutorials and patterns for home sewers.
Rae says
I want to make these with my children’s names on them (coordinating fabric letter for each triangle.) How would you go about applying the letters?
Leigh Anne says
You could either get fusible interfacting and fuse them down or you could applique stitch or zig zag them down on the fabric. I would probably fuse them down first so they don’t move around and then stitch around them with a zig zag stitch. Have fun!
Michelle says
I used your tutorial to make a bunting for my family pictures… I would say it was a success!!! Here is the link to our pics:
http://photosbybeca.com/2011/11/rose/
Thanks for the tutorial!
Ali Robinson says
OMgoodness. I was browsing the site and saw this tutorial, suddenly deja vu. I made a bunting line for a royal wedding party and used the exact same fabrics. Minus the fire-work looking one. Awesome just awesome! They are just meant to go together aren’t they. 🙂 Love it.
Lindsay @ SewLindsaySew says
Hi! I love this beautiful tutorial. 🙂
Just wanted to give you a head’s up that I recently linked it from my blog, SewLindsaySew. — > http://sewlindsaysew.wordpress.com/2011/10/18/do-the-sewing-touchdown-dance
Thanks for sharing this project – can’t wait to try it out!