This post may contain affiliate links. Please see disclosure policy here.
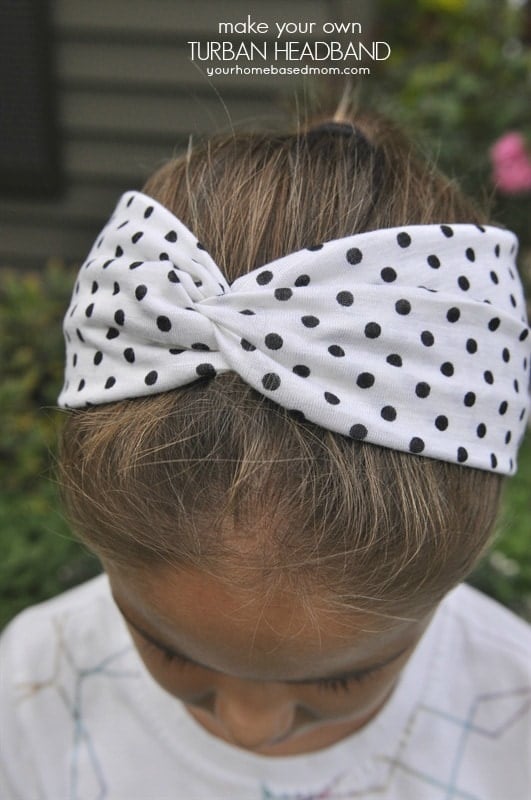
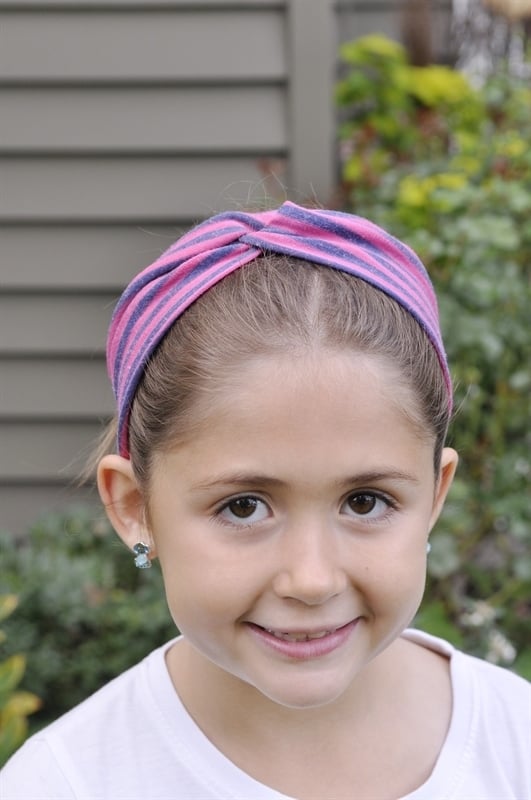
Make your own cute turban headbands in a matter of minutes with this step by step tutorial.
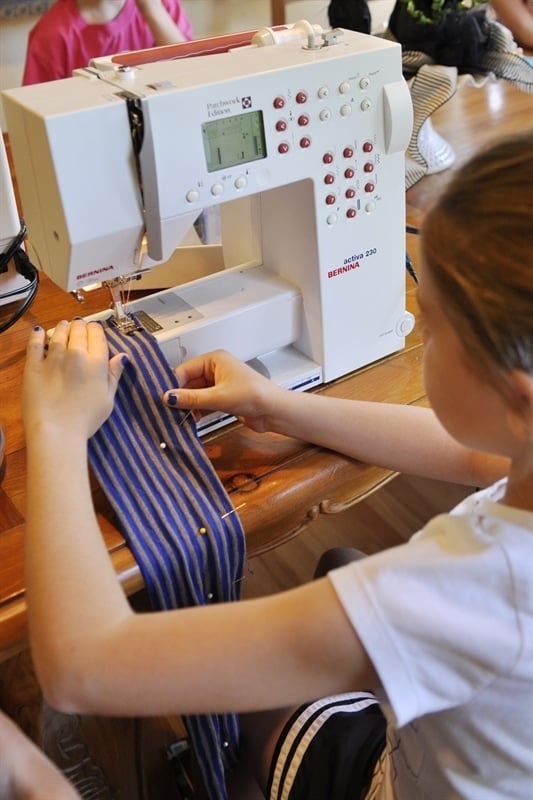
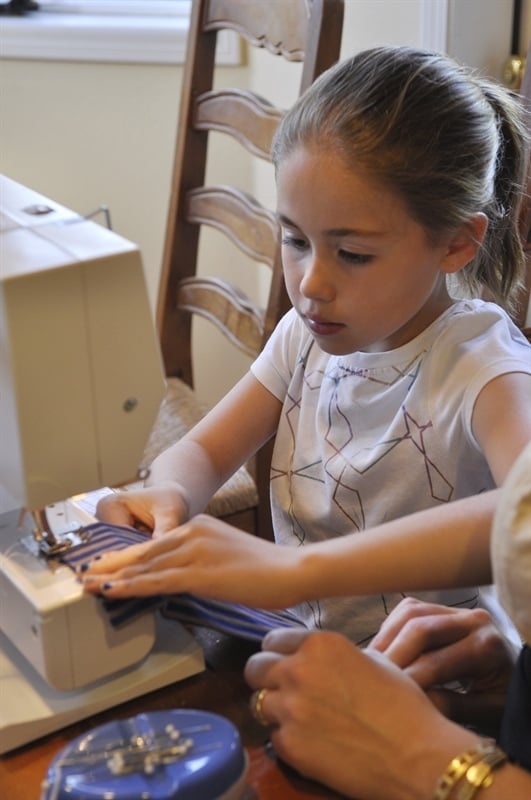
Last week I was able to hang out with my Activity Day girls again. They haven’t gotten someone to take my place yet but I know it’s coming. This week we did a fun little sewing activity. I spent many years teaching children’s sewing classes so I love being able to do a sewing project with these girls now and then. I also wanted to make myself some of those cute knit turban headbands I’ve seen people wearing so I thought I’d teach the girls how to do it too.
When my girls were younger, around the holidays, I was always on the look out for a quick, inexpensive, easy to make gift that my girls could give to their girlfriends and these turban headbands would be perfect for that.
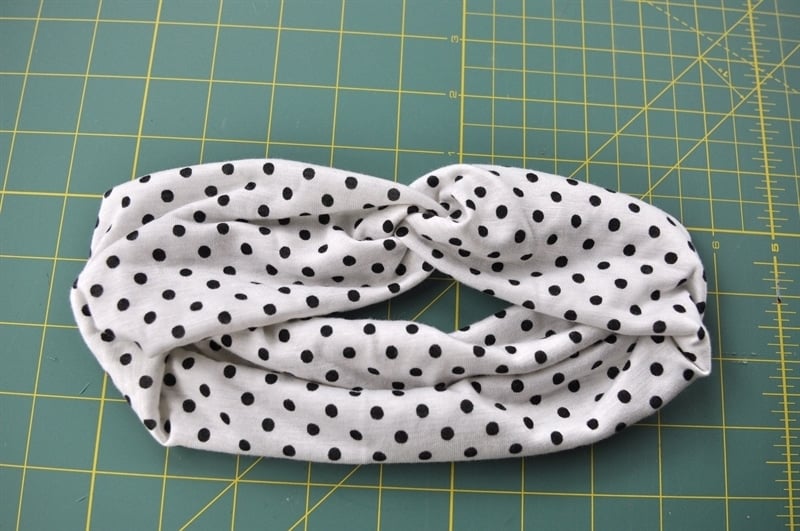
I borrowed one from a friend and took it apart so I could see how it was put together! So easy and so cute!
All you need is some 1/4 yard stretchy knit fabric, thread, a cutting mat, rotary cutter, straight edge ruler and a sewing machine. You will be able to get two headbands out of 1/4 yard of (60″ fabric)
How To Make a Turban Headband
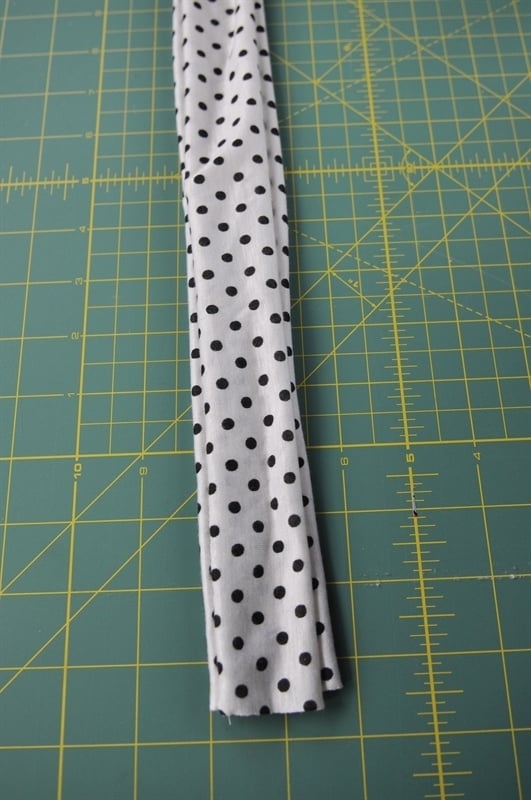
Step One: Cut your fabric into an 8 x 20-22″ strip for an adult head. For the girls I cut them 8 x 18″. You want it to comfortably fit around the head, not too tight, not too lose.
Step Two: Fold strip in half, right sides together and stitch up the side using a 1/4 inch seam. Turn the tube right side out with the seam down the middle.
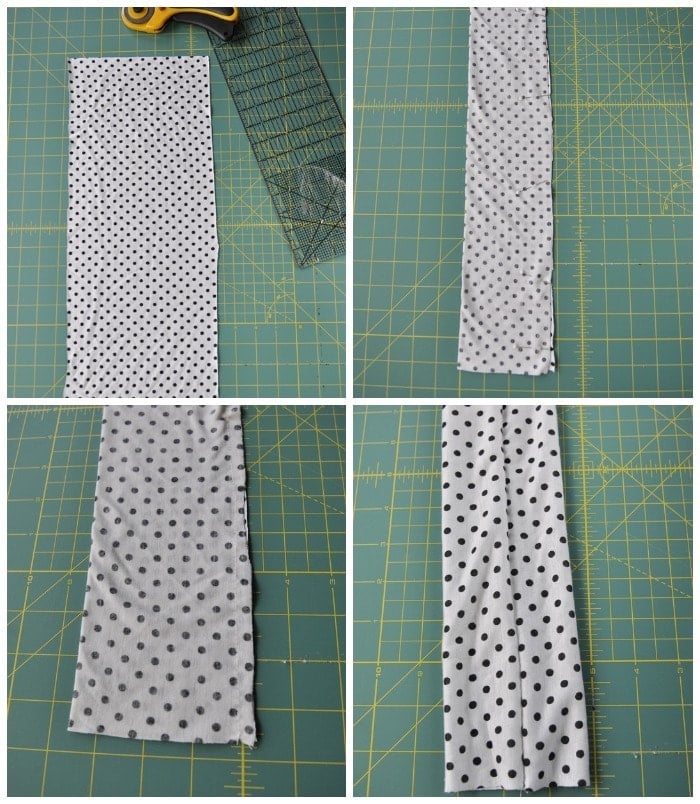
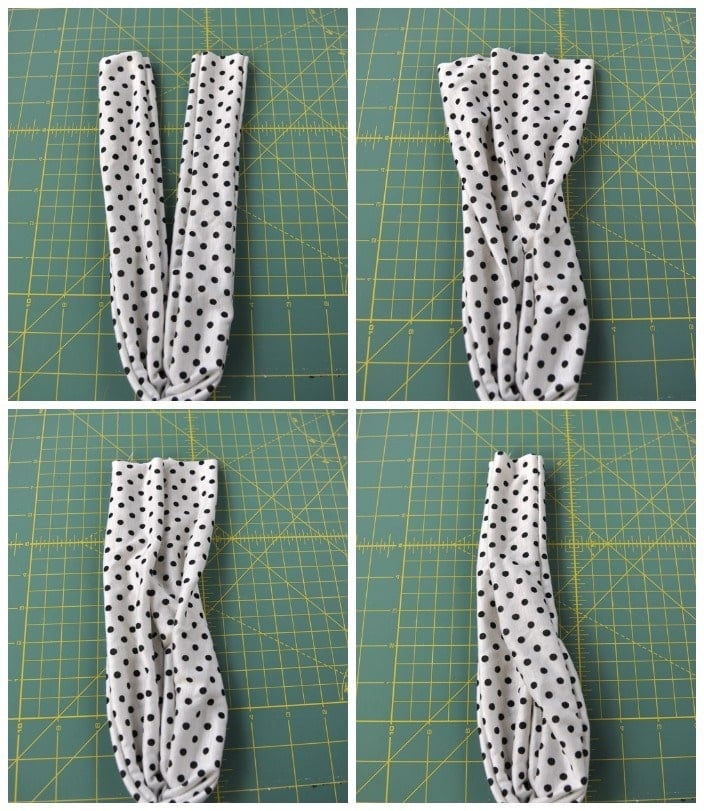
Step Three: Fold strip in half with the seam down the left hand side.
Step Four: Bring the bottom end up to the top end. Open up the ends and place one half of the right side inside one half of the left side. Then fold the left side over the right side and the right side over the left side so that the ends end up sandwiches in between each other.
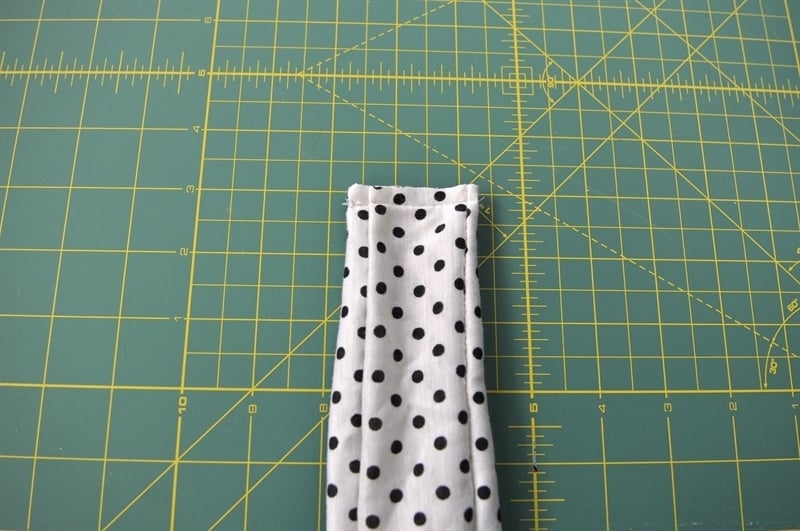
Step Five: Stitch across the ends with a 1/4 inch seam
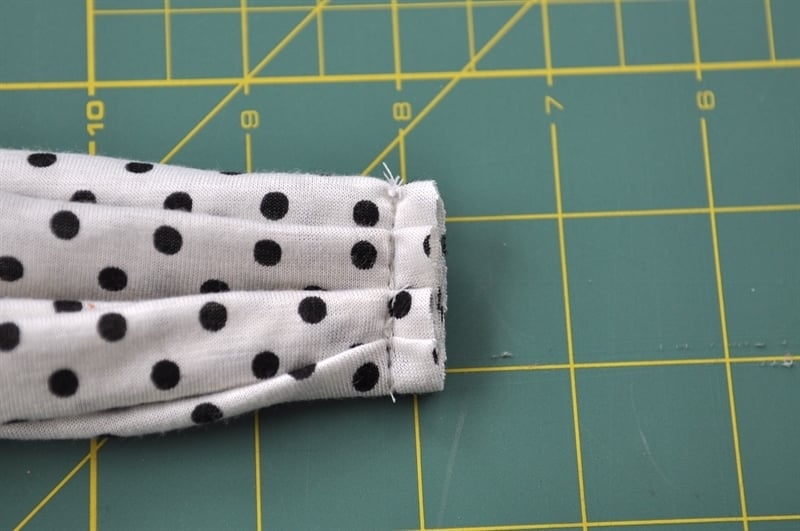
Step Six: Fold the right side in about 1/3 of the way and then stitch down again.
And you’ve got a turban headband!
The girls loved making them and had lots of fun with it. With each activity I try to tie in a spiritual message. After we had made our headbands we had a discussion about the following scripture and what it means to wear a crown of righteousness.
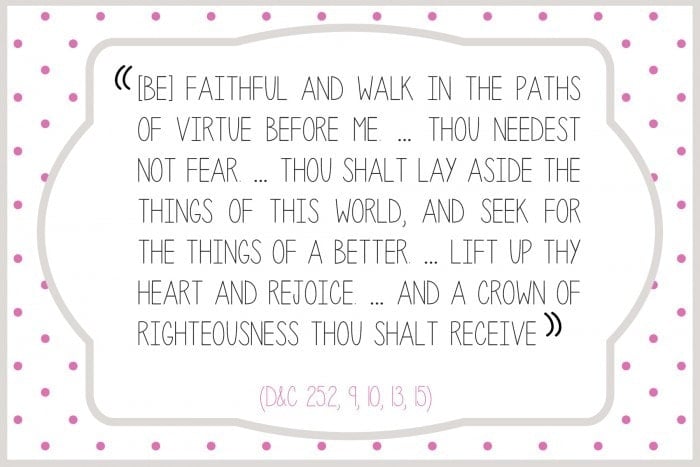
We talked about how we can wear a crown of righteousness each day by making good choices, offering service, saying prayers, reading scriptures, etc. The girls came up with lots of great ways they can wear a crown of righteousness. I told them that each time they wear their headband to remember this scripture and to ask themselves how they can wear a crown of righteousness that day.
Click here to download scripture
Jan from Bear Mountain says
what hides the last step of sewing? I see photo of finished headband but I don’t see where, when you seam- ends together, where does that end go?…in the inside of back of turban, with together sewn ends exposed??..Thanks, Jan
Leigh Anne says
The seam is on the underside of that middle section so it is on the inside of where the two ends are sewn together.
nallely says
how do you sew the middle part?
Leigh Anne says
Step Five is what becomes the middle part.
nallely says
but if i am stitching by hand?
Teri says
Cant find the link to print the pattern for the turban headband
Leigh Anne says
Teri, There isn’t a pattern to download but the directions and measurements are given in the post.
Teresa says
What a awesome idea….I will pinning this for future use. Thanks for sharing your talents!
Happy Day
Mitzie says
How wonderful an idea. I can’t wait to make some headbands for Christmas! Also thank you for the time you take to instill the craft of sewing to young girls. What a blessing it was to read your blog. The scripture touched my heart.
Leigh Anne says
Thank you Mitzie. I am worried that sewing is becoming a dying art!
Katherine says
That Would Be So Sad I Sew At Least Once A Day