This post may contain affiliate links. Please see disclosure policy here.
Liven up an old piano with some chalk paing. I will show you how to paint a piano, step by step.
This summer I needed a project. I am a project person. I decided that it was time to redecorate my living room. I have never really liked my living room. It always felt too dark and heavy. As a result I never spent much time in there except for holidays. I decided it was time to lighten up my life!
The whole new living room reveal will come later but today I am excited to share the transformation my piano underwent.
Our piano is old. I’m not exactly how old it is but when we bought our first home back in 1986 it was in the house. We paid the owners who were moving into a retirement home a few hundred dollars for it. It has been a great piano for our family. All of our children learned to play the piano on it and many a Christmas carol has been sung around the piano.
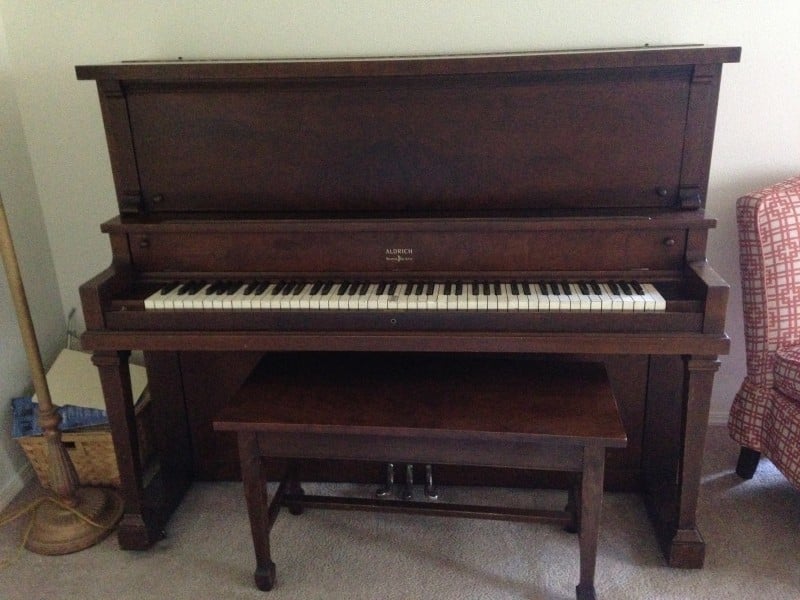
But it was just too big and dark for my new lightened up decor. Since there are no kids at home any more, I rarely play and the only time it seems to get used is Christmas Eve I thought about getting rid of it. I had a small revolt from a few of my children, one in particular who considers it his piano since he is the only one that still plays the piano. So I decided to keep it but something had to change.
I decided that painting it was the solution. That same child who revolted against me selling the piano also wasn’t too happy about me painting it either but oh well! I have to admit it did seem a little “sacriligious” to paint the piano but I decided to do it anyway.
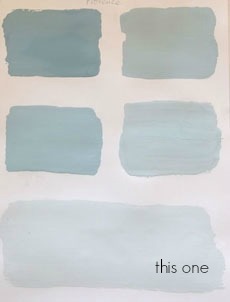
Deciding on the color was the hardest part. After a little research I knew I wanted to use chalkpaint. I love the fact that there is no prep work with chalkpaint. No sanding, no priming all you do is paint with the chalkpaint!
I used Annie Sloan Chalkpaint which can be bought at two different places here in Portland that I know of. I purchased my paint at The Purple Pear in SE Portland. The owner was very helpful and she even gave me samples of different colors to take home. She also sells the paint online. There is also another shop in Hillsboro that sells Annie Sloan Chalkpaint that I have purchased from before also called B Designs Home Decor and the owner is great too!
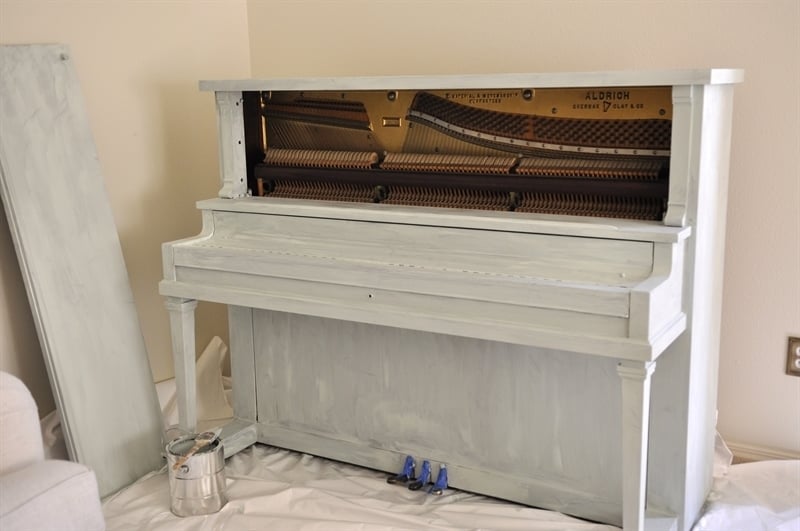
I ended up chosing Provence diluted 4 to 1 with Old White.
The process was easy. I removed the front of the piano first. This was the only part of the piano I took apart. It came off easily by releasing some levers.
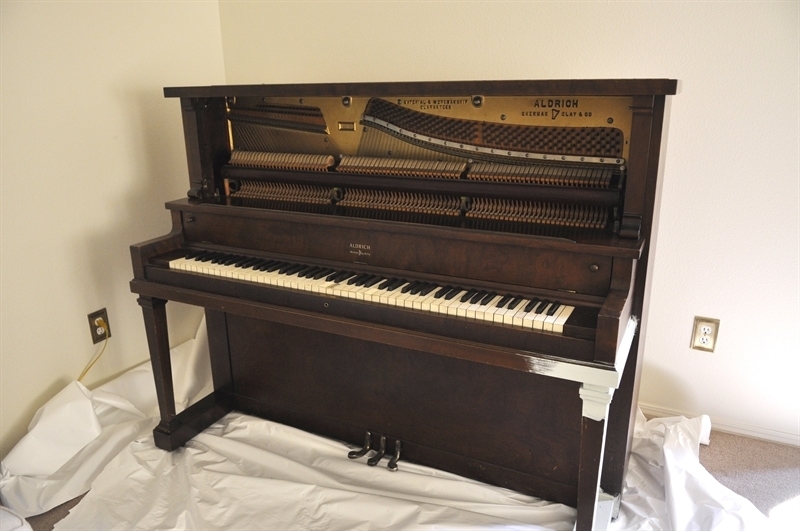
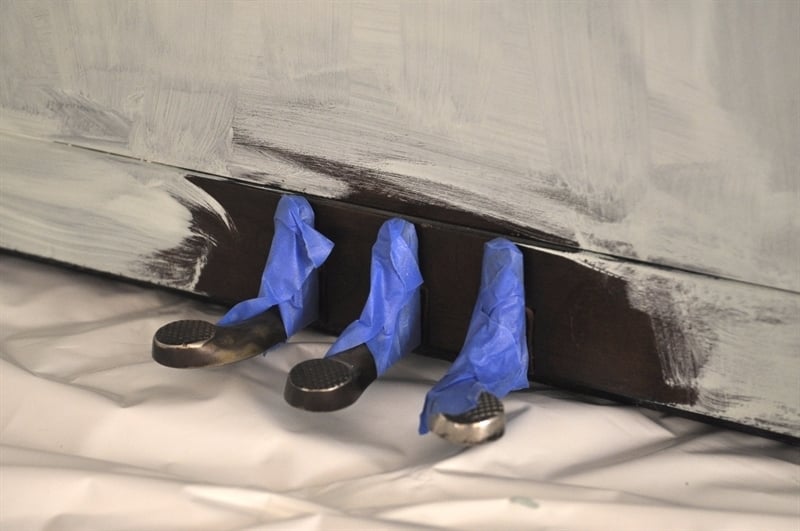
I also taped around the foot pedals and the keys.
And then I just started painting. I did paint the piano bench first because I decided if I hated it I could just buy a new piano bench! I decided I loved it and then I just went for it!! I was a little nervous putting that first brush full of paint on the actual piano.
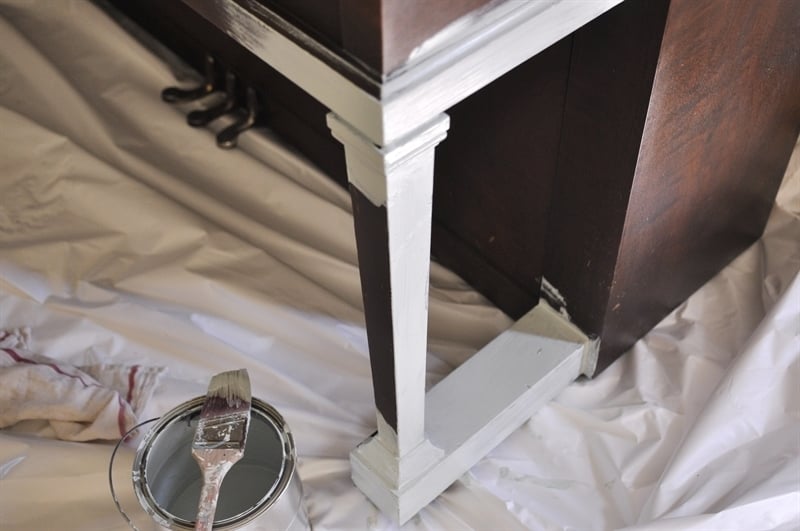
Here it is with the first coat. I ended up putting 3 coats on since the piano was so dark. After the third coat I lightly distressed the edges and then put a couple of coats of the Annie Sloan clear wax on it. There are lots of YouTube videos out there on how to apply the wax.
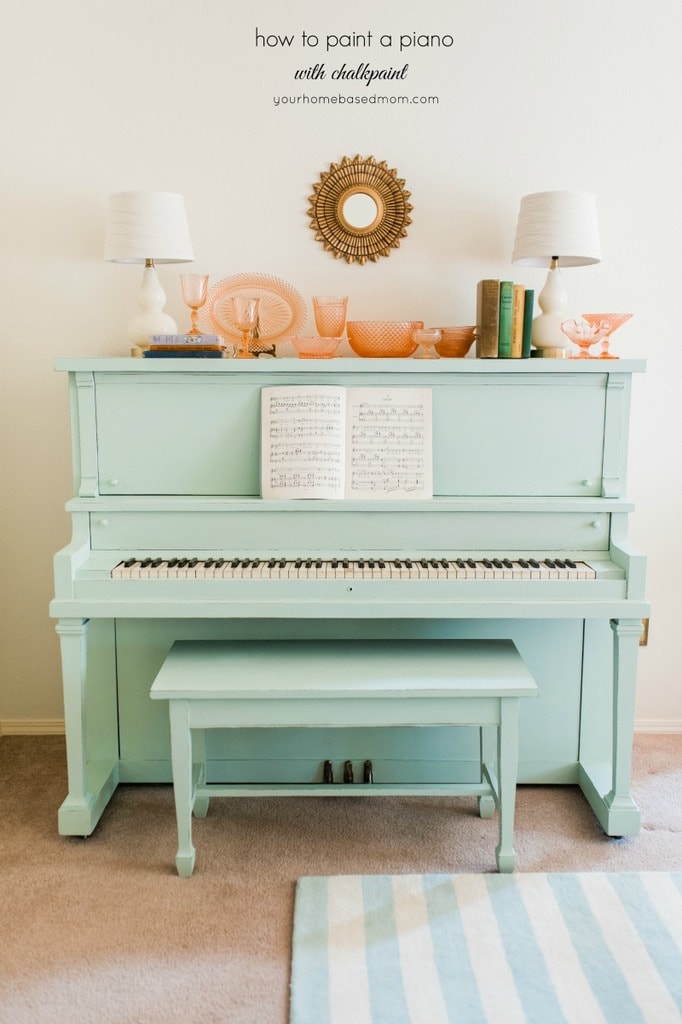
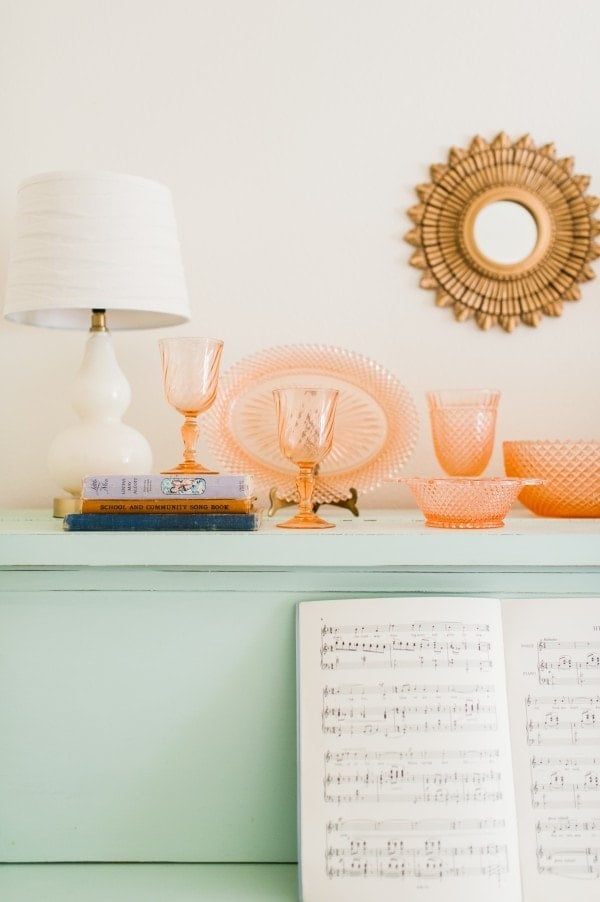
And here is the finished project. Isn’t she pretty!!
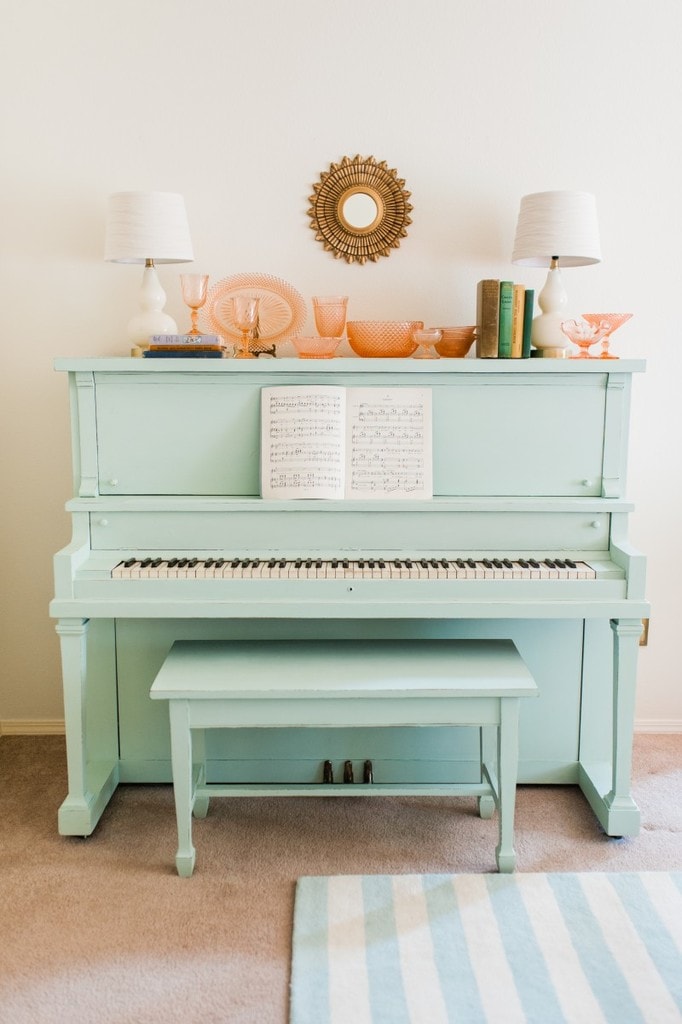
I have to say I am totally in love.
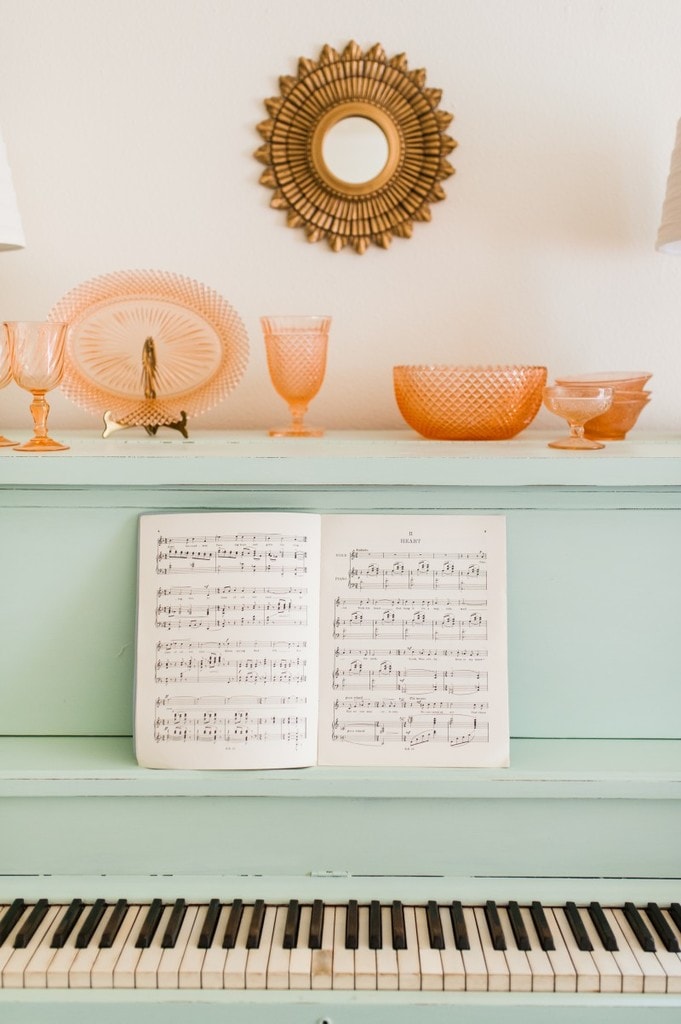
It is so pretty now, I’m inspired to sit down and play! Someone asked me if painting it changed the tune of the piano. My reply was that unfortunately it was still as out of tune as it was before. Need to get a piano tuner over here!
Gail says
I had to laugh when I saw this piano online. A few years back I also painted my piano….in a similar color. Mine has a little more color and less gray. My story is a little sadder than yours, though. Mine sounded pretty good, although it’s ancient, as it is an upright baby grand; but after dragging it across the living room (I was also sanding and painting the floor.), putting 2 coats of primer and 2 coats of paint on it and moving it back in place (after the painting on the side of the room where it was previously located was done, as well), it started to “lose it”. Now a have 2 broken notes (that I didn’t have before) and it doesn’t sound at all like it did. I don’t know if it was the paint or the move. So, whereas before I had a rough-looking piano that sounded pretty good for its age, I now have a pretty piano that sounds awful and has broken notes. I’m not sure I gained anything for my efforts…except it does light up that corner of the room!
Stacy Rosen says
When you painted the area around the keys, underneath where the cover slides back, did you remove anything else? Did you just tape off the keys?
Leigh Anne says
I just taped off the keys
Kara G says
Hello! I’ve done chalk paint (and some milk paint on my fireplace) quite a bit before, but not on my piano. We appear to have the same piano style, and I’m wondering (can’t tell from the pictures) what you did about the hinges that run along the top and the key cover? Try and tape, or paint right over them? I’ve got all my supplies and am anxious and excited to get started!
Leigh Anne says
Kara, I painted right over them. Have fun!
Lexi says
About how long did it take you? How much paint did you have to use? How well has it held up? It’s beautiful!
Leigh Anne says
Lexi, It went a lot faster than I thought it would, probably total a couple of hours. I used a quart of paint and it has held up beautifully!
Lexi says
Thanks so much for the reply! I just bought my first piano and I can’t wait to try this after reading your experience. Mine is 99 years old but in decent shape, and I think painting it will make it more beautiful. ????
Jewels says
I would love to try this on my piano after seeing how beautifully yours turned out! Your post really inspired me, but in all honesty, I am not a crafty person, and the thought of this scares me…A LOT!! Do you think someone of an extreme beginner skill-level could pull this off?? Also, now that you’ve had the paint on for a while, how is the finish holding up??
Leigh Anne says
Jewels, The paint is holding up greate and all you really need to be able to do is work a paintbrush for this project – no crafty genes required. You can do it!
Start with the piano bench first, it’s good practice and easier and if you decide you don’t like it, all you have to do is replace the piano bench!